SettingsUserEmail setup
Email Accounts
Connect your email account to send and receive emails directly from the CRM.
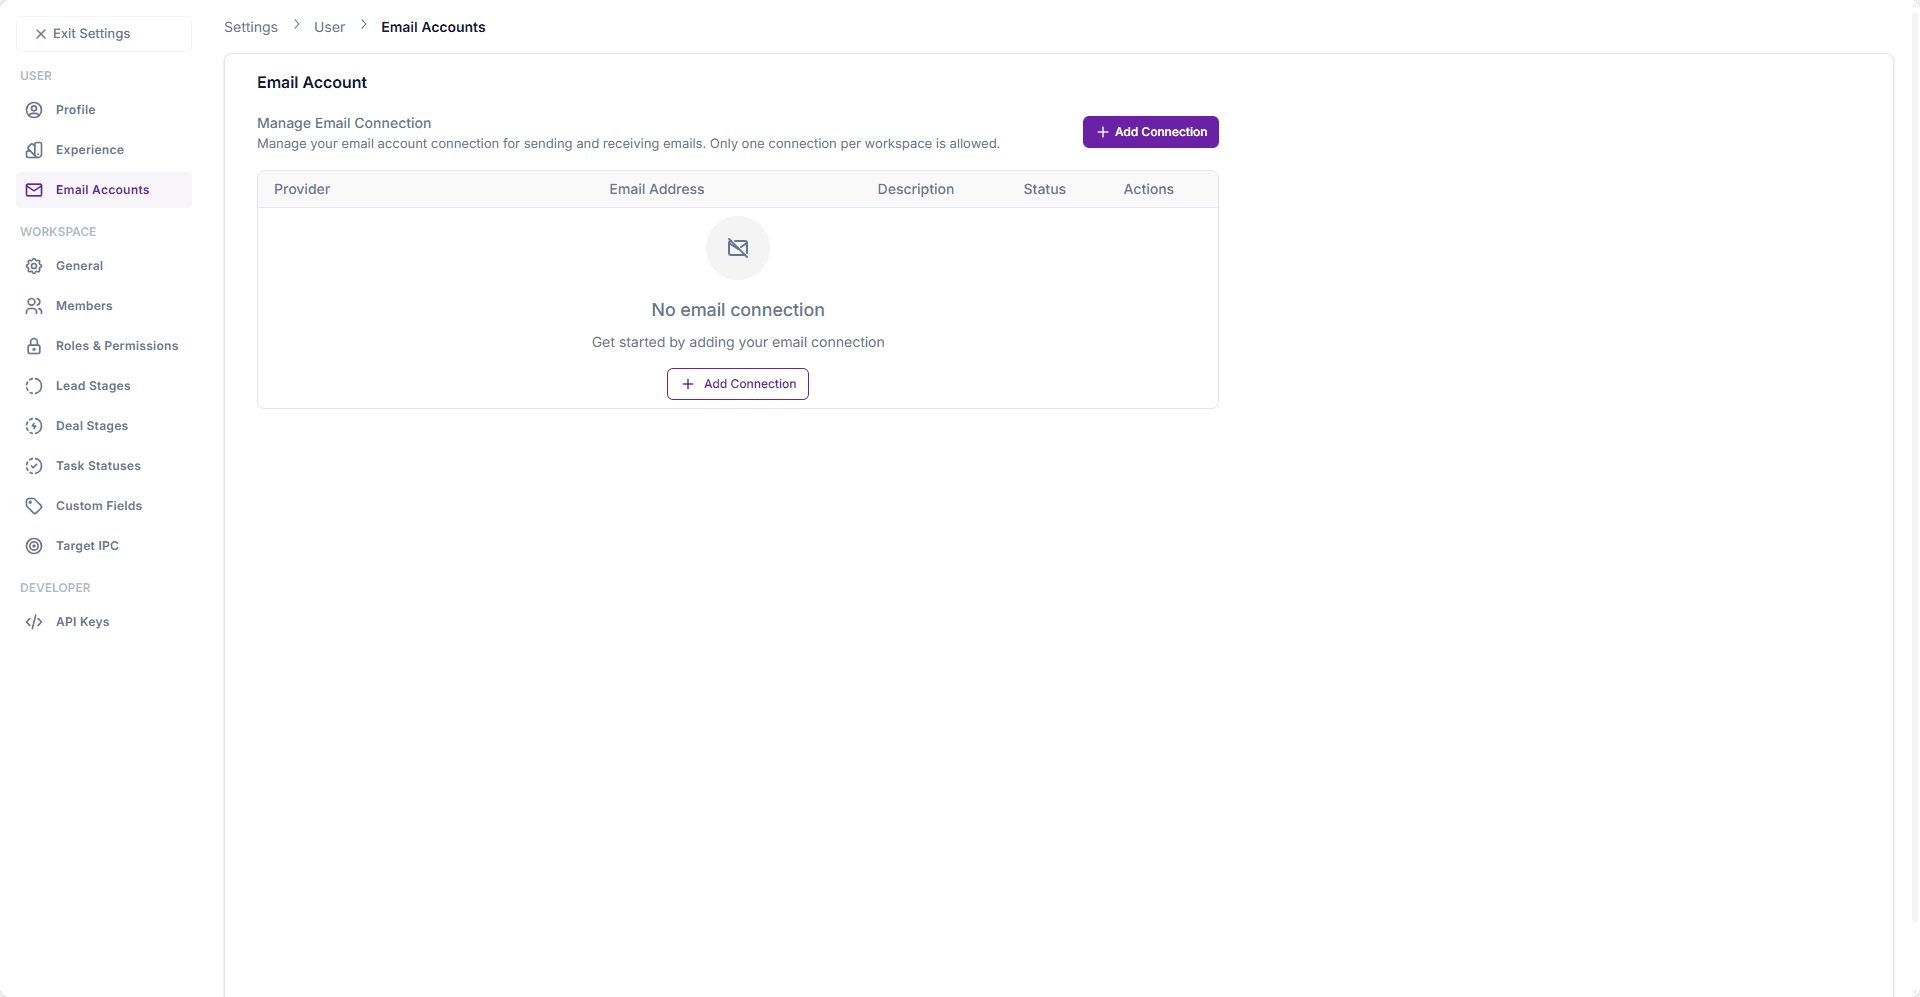
The Email Accounts section allows you to connect your personal or work email with the CRM.
This enables you to send, receive, and track emails seamlessly within the platform.
You can access it from:
Settings → User Settings → Email Accounts
Manage Email Connection
- Only one email connection per workspace is allowed.
- You can add, view, and remove your email account from this page.
The table displays:
- Provider – Email service (Google, Microsoft, SMTP).
- Email Address – The connected account.
- Description – Optional notes about the account.
- Status – Connection status (active/inactive).
- Actions – Options to edit or remove the connection.
Adding a New Email Connection
Click + Add Connection to open the Add Email Connection dialog.
Step 1: Select Provider

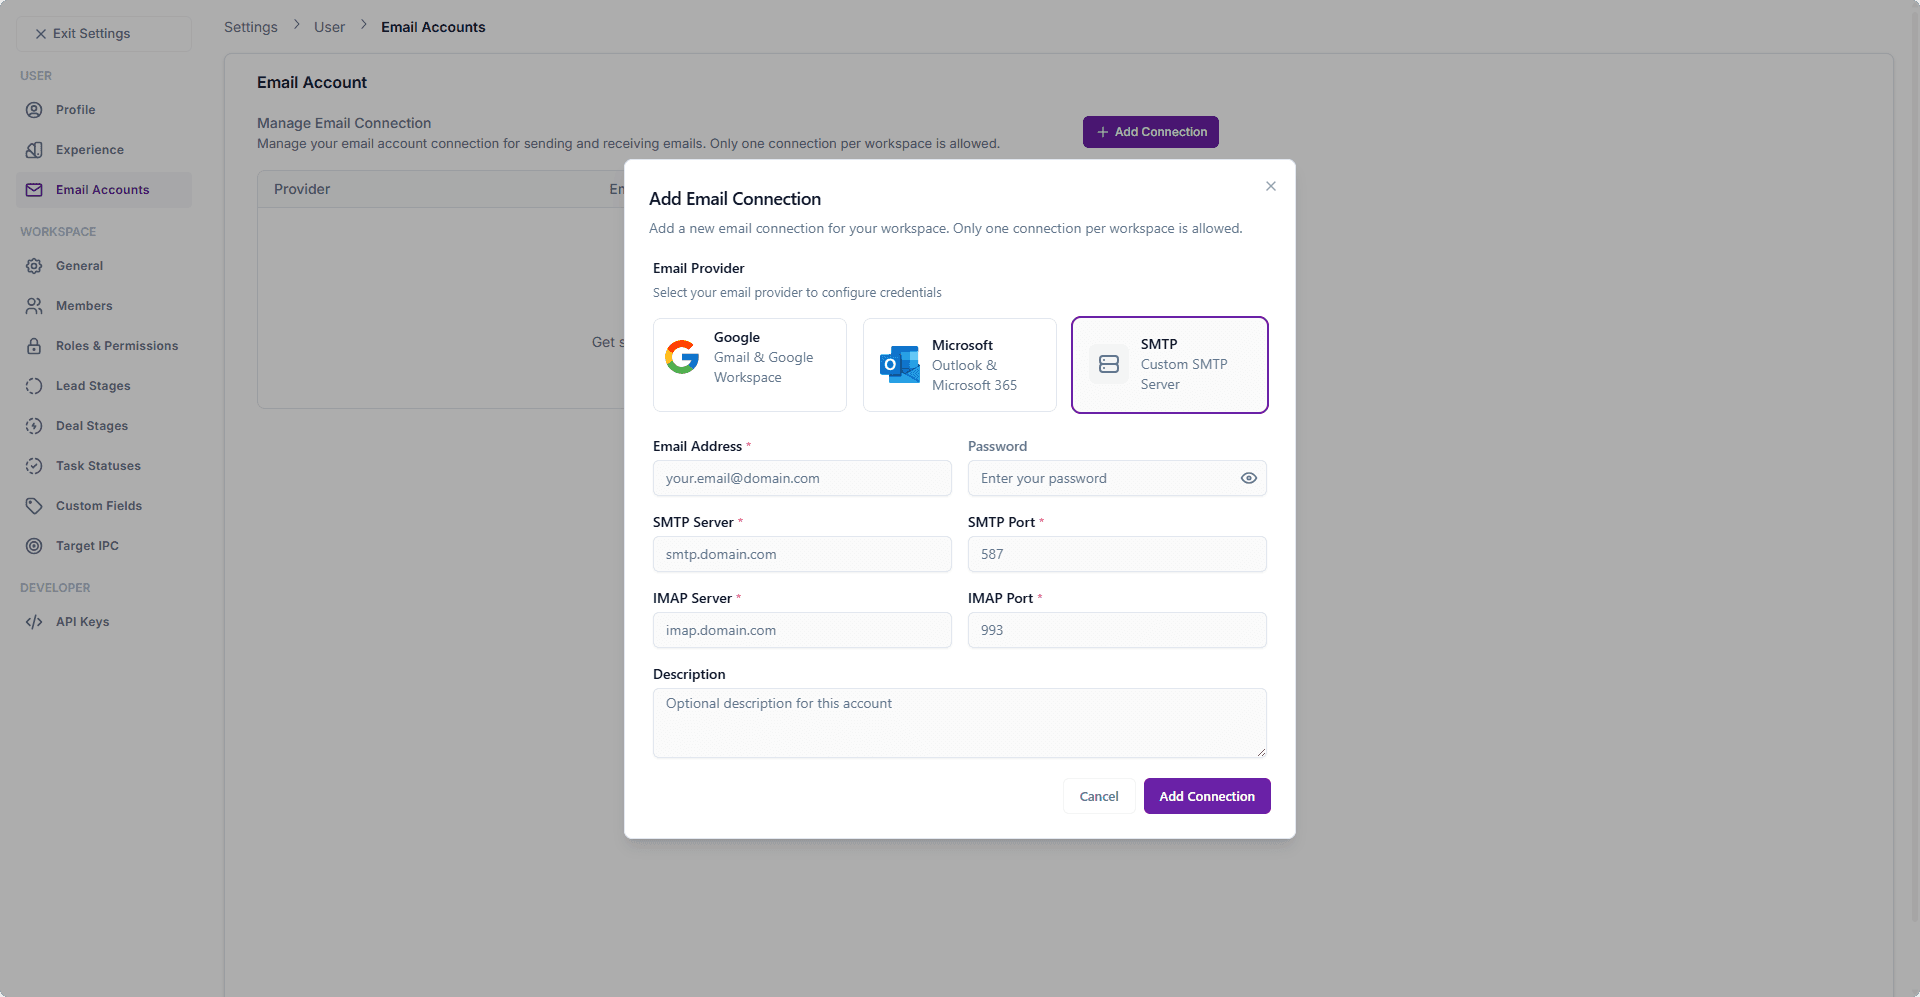
Choose your email provider:
- Google (Gmail & Google Workspace)
- Microsoft (Outlook & Microsoft 365)
- SMTP (Custom SMTP Server)
Step 2: Enter Credentials
- Email Address – The email you want to connect.
- App Password – Enter your provider’s app password (required for authentication).
- Description – (Optional) Add a label to identify this connection.
Step 3: Save
Click Add Connection to link your account.
Updating or Removing a Connection

- Edit – Update the account description or credentials.
- Remove – Disconnect the email account from the CRM.
⚠️ Once removed, emails will no longer sync with the CRM.
Best Practices
- Always use App Passwords instead of your main email password for security.
- Ensure you have admin permission if connecting a workspace-wide account.
- For SMTP connections, confirm server settings with your IT team.
- Keep only one active email connection per workspace to avoid conflicts.
Related Modules
- Lead – Add leads directly to email sequences.
- Email Sequence – Automate follow-ups and nurture campaigns.